
Avoid Common Exterior House Painting Mistakes
Learn common exterior house painting mistakes Toledo homeowners make. Discover why skipping power washing or small repairs leads to peeling paint and.
Thinking You Can Skip Washing the House
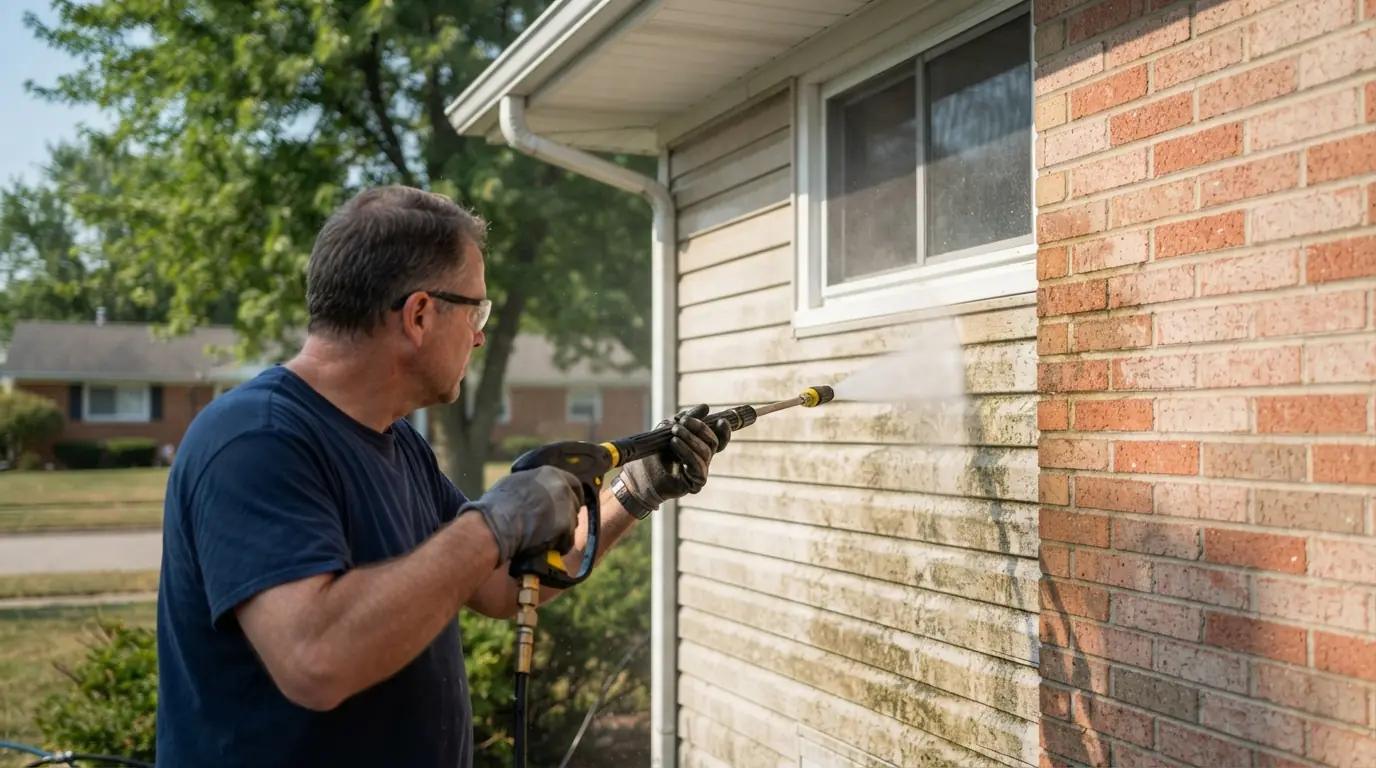
One common mistake homeowners make before painting is thinking a quick rinse or no wash at all is good enough. You might hose down the siding on your 1950s brick ranch in Reynolds Corners and call it a day, figuring the new paint will cover anything. But even if the house doesn’t look visibly dirty, it likely has years of grime, pollen, and mildew built up, especially on the north-facing walls or under eaves. Toledo’s humidity from Lake Erie and our long, damp spring and fall seasons are perfect for mildew to grow on siding.
When you paint over dirt or mildew, the paint doesn’t stick to the house. It sticks to the dirt or mildew. This means your new paint job, which you’ve invested time and money in, will start flaking and peeling long before it should. You might see paint bubbling up within a year, especially on those mildew-prone spots.
Instead, thoroughly wash your house. For most homes with wood siding, fiber cement, or even previously painted brick, a good power washing is the way to go. Be careful with power washers; too much pressure can damage siding, especially older wood, or force water behind it. A setting around 1500-2000 PSI is usually sufficient for cleaning without causing damage. Start with a lower setting and increase it carefully. If you’re unsure, or if your house has delicate trim like some of the Victorians in the Old West End, it’s better to use a garden hose with a scrub brush and a dedicated house wash cleaner. Make sure to rinse thoroughly from top to bottom. Allow at least 24-48 hours for the house to dry completely before doing any other prep work, even longer if it’s been particularly humid, like after a week of 80% humidity in July.
Ignoring Small Repairs Before the Brush Comes Out
It’s tempting to think that a fresh coat of paint will magically fix everything, from hairline cracks in stucco to a small patch of rotted wood on a window sill. A homeowner in Sylvania might look at a few soft spots on their deck’s fascia board or some loose caulk around a door frame and think, “The painter will just go over that.”
This is a costly assumption. Paint is a protective layer and a cosmetic finish, not a structural repair material. If you paint over rotten wood, the rot will continue to spread underneath the paint. The paint will eventually crack and peel in that area because it has no solid surface to adhere to. If you paint over loose caulk, the caulk will fail, letting moisture in, and the paint will crack along with it. This means you’ll be dealing with moisture issues, re-painting touch-ups, or even larger repairs much sooner than expected, effectively doubling your work or expense.
The correct approach is to fix these problems first. Go around your entire house and inspect it. Look for:
- Rotten or soft wood: Probe any suspicious areas with a screwdriver. If it’s soft or crumbles, it needs to be replaced. For small areas, a wood hardener and wood filler might work, but larger sections need new wood. This is common around window frames, door jambs, and corner boards on older homes in neighborhoods like Ottawa Hills or Westgate.
- Cracked or missing caulk: Scrape out old, failing caulk around windows, doors, and trim. Reapply a high-quality, paintable exterior caulk. Pick one rated for outside work. It needs to stay flexible through our Toledo temperature swings, from a hot August day to a bitter January night.
- Loose siding or trim: Secure any loose pieces with nails or screws.
- Cracks in stucco or masonry: Repair these with appropriate patching compounds.
Doing these fixes yourself takes time. But it’s a big deal for a lasting paint job. If it feels like too much, a local handyman service like Toledo Handyman and Home Repair can often handle these kinds of repairs before the painting crew arrives. Our standard service visit is $89 and covers diagnostics plus many small fixes, with bigger jobs quoted upfront.
Not Scraping and Sanding Loose Paint
Another common shortcut is to skip the detailed scraping and sanding, especially if the old paint seems mostly intact. Someone might just paint over lightly chalking or peeling areas on their older Craftsman home in Old Orchard, believing the new coat will bind everything together.
When you don’t properly remove loose, peeling, or chalking paint, you’re building your new paint job on a shaky foundation. Paint needs a clean, stable surface to bond to. Old, flaking paint will continue to flake, taking your new paint with it. Chalking paint, which is the powdery residue left by old, oxidized paint, prevents new paint from sticking right, leading to poor coverage and early failure. This means your fresh coat will not last as long, and you’ll see peeling and an uneven finish, wasting both your materials and labor.
Instead, dedicate serious time to scraping and sanding. Use a sturdy metal scraper to remove all loose and peeling paint. Pay close attention to areas that get a lot of sun exposure, as UV rays break down paint faster. Once the loose paint is off, lightly sand the edges of the remaining paint to feather them into the bare wood or substrate. This creates a smooth transition and helps prevent “picture framing,” where the edges of the old paint show through the new coat. Use 80- to 120-grit sandpaper for this. A pole sander can make this job easier on higher sections. After sanding, wipe down the surfaces to remove dust. This step is tedious, but it’s the difference between a paint job that lasts five years and one that lasts fifteen years through Toledo’s weather.
Skipping Primer, Especially on Bare Wood
Many homeowners think primer is an optional step, especially if they’re painting a similar color. They might decide to paint directly over a newly replaced piece of trim or a previously painted, but now exposed, section of bare wood on their colonial-style home near Wildwood Preserve.
Primer is not optional for most exterior painting projects. Primer does a few important jobs. When you paint directly over bare wood, the wood absorbs the paint unevenly, leading to a splotchy finish. It also requires more coats of paint to achieve full coverage, costing you more in materials. On stained areas, or areas with tannin bleed (common in cedar and redwood, even some pine), the primer acts as a barrier to prevent these stains from bleeding through your new topcoat. For drastic color changes, primer helps achieve true color faster and more efficiently. Without it, your new paint job might look uneven, require extra coats, or even show stains bleeding through after a few months, especially with Toledo’s temperature and humidity changes.
Always use an appropriate exterior primer.
- For bare wood: Use a high-quality acrylic latex primer. If you’ve got cedar, redwood, or knotty pine that could bleed tannins, an oil-based primer or a stain-blocking acrylic primer is a must.
- For metal surfaces (like railings or gutters): Use a rust-inhibiting metal primer.
- For drastic color changes or chalky surfaces: A bonding primer will help the new paint stick better and provide a uniform base.
One good coat of primer seals the surface. It helps the paint stick. It also sets up a smooth, even base for your topcoats to last.
Painting When It’s Too Wet or Too Cold
The weather in Northwest Ohio can be tricky. It’s October now, and while we might have some beautiful, crisp days for exterior work, cold snaps and rain showers can pop up quickly. A common mistake is rushing to get the paint job done before winter, even if the conditions aren’t ideal. Someone might push ahead with painting on a day when the temperature is forecast to drop below 40 degrees Fahrenheit overnight, or right after a morning dew.
Painting in the wrong conditions is a recipe for paint failure. Paint needs specific temperature and humidity ranges to cure properly. If it’s too cold, the paint won’t dry or cure, leading to poor adhesion, cracking, and a shorter lifespan. If there’s too much moisture, either from rain, heavy dew, or high humidity, the paint can blister, peel, or streak. This means your new paint job will look bad quickly and won’t protect your home as intended, leading to premature failure and the need to repaint sooner than you should.
Always check the weather forecast and the manufacturer’s recommendations on your paint can.
- Temperature: Most exterior paints require temperatures to be between 50°F and 90°F during application and for at least 24-48 hours after. Some newer low-temperature paints can go down to 35°F, but check the label specifically. Given today is Columbus Day, we’re right on the edge of prime painting weather; pay close attention to overnight lows.
- Moisture: Never paint on a wet surface. Allow at least 24 hours after rain for the surface to dry completely. Avoid painting when heavy dew is present or forecast, or when humidity is very high (above 85%). A good rule of thumb is to start painting after the morning dew has evaporated and stop painting a few hours before evening dew or cold temperatures set in. This lets the paint skin over before any moisture can mess with it.
- Wind: Strong winds can cause paint to dry too quickly. This leads to brush marks. It also makes overspray a big problem, especially when using sprayers.
Paying attention to the weather will save you a lot of grief. It also helps your paint job last. For other seasonal home maintenance tips, you might find our nw ohio winterizing checklist 2026 useful for the upcoming months.
Neglecting Landscaping and Non-Painted Surfaces
It’s easy to get focused on the painting itself and forget about everything else around the house. A homeowner might start painting their garage siding in South Toledo without trimming back the overgrown rose bushes or covering their concrete driveway.
This oversight can lead to frustrating and expensive cleanup or damage. Paint on bushes or plants can harm them. Paint drips on concrete, pavers, or asphalt are difficult, sometimes impossible, to remove without harsh chemicals that can damage the surface. Paint on windows, light fixtures, or hardware looks unprofessional and takes extra time to clean up. This means you’ll spend extra time scraping paint off glass, scrubbing concrete, or potentially replacing damaged plants, adding unnecessary work and cost to your project.
Take the time to protect everything you don’t want painted.
- Trim and Tie Back Landscaping: Trim bushes and shrubs at least 12-18 inches away from the house. Tie back anything that can’t be trimmed, like small trees or vines, using twine. This gives you clear access and stops paint from getting on them.
- Cover Plants: Use lightweight plastic sheeting or canvas drop cloths to cover flower beds and smaller plants directly below the areas you’re painting.
- Protect Hard Surfaces: Lay down heavy-duty canvas drop cloths on concrete driveways, walkways, patios, and decks. Plastic sheeting can work, but it’s more prone to tearing and can be slippery. If you’re working on your deck, you might also find our post on deck staining cost nw ohio 2026 helpful for future projects.
- Mask Windows and Fixtures: Use painter’s tape and plastic sheeting to carefully mask off all windows, light fixtures, downspouts, mailboxes, and any other elements you don’t want painted. Blue painter’s tape usually provides a clean line and removes without residue for up to 14 days.
A little extra time spent on preparation will save you hours of cleanup and potential trouble down the road. If you’re looking for help with your interior painting, check out our interior painting services.
Book a visit at https://www.toledohandymanandhomerepair.com/portal or call 419-574-5623. The $89 standard visit covers the diagnostic and small repairs, and you’ll get a straight number on anything bigger before work starts.
Submit it through the portal
$89 standard visit. Same-day quote. Live photos.
Request a Service